Deploy a Universal Print Printer with Intune
Deploying Universal Print through Microsoft Intune is a straightforward process, but you need to follow a few essential steps to ensure everything works smoothly.
Licensing Requirements for Universal Print
Before setting up Universal Print, ensure your users have the necessary licenses. Universal Print is included in several Microsoft 365 and Windows subscriptions. Here are some key licenses that include the entitlement:
- Microsoft 365 E3/E5
- Windows 10 Enterprise E3/E5
- Microsoft 365 Business Premium
- Windows 365 Business or Enterprise
Make sure your organization has one of these subscriptions, as it grants access to Universal Print without additional costs. You can find a full list of subscriptions that include Universal Print here.
Device Config
Create a Configuration Profile
To begin printer deployment, navigate to Devices > Windows > Configuration Profiles. Select + Create Profile, and in the platform dropdown, choose Windows 10 and later. Under profile type, select Settings Catalog.
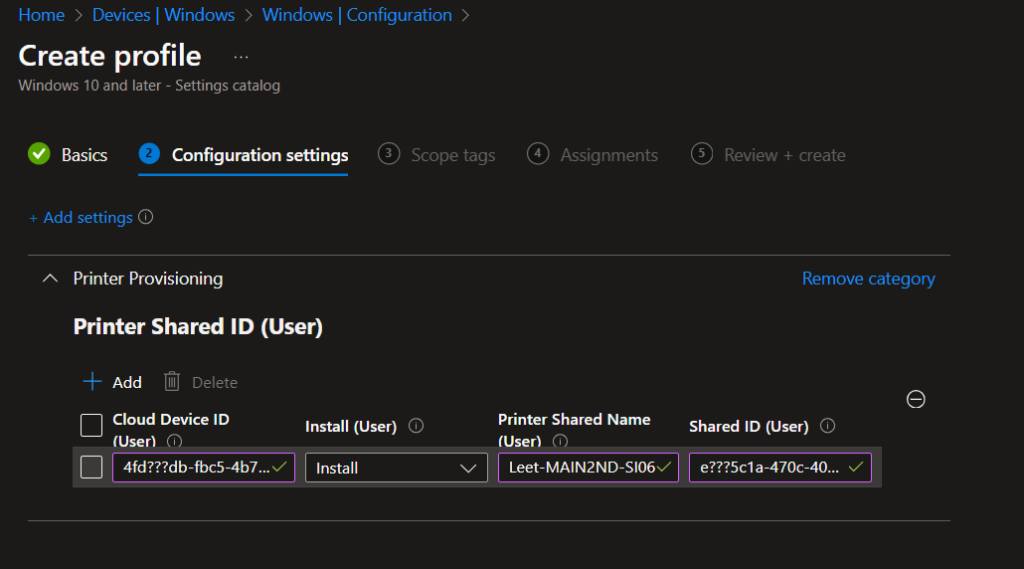
Within the settings catalog, search for “Printer.” You’ll see options like Printer Provisioning, Cloud Device ID, and Shared Printer Name. Fill these in with the relevant information. The info can be found in the Universal Print setup portal. I would really like to see that this is a drop down list in the future with all UP published printers…..
Universal Print portal:

Settings Catalog:

Its possible to add multiple printers in each policy.
Assign the Profile to Users or Devices
Next, assign the profile to the relevant user groups or devices. Make sure the group includes users or devices that need access to the printer. This ensures the automatic installation of the printer once deployed.
Suggested screenshot: The assignment screen with a highlighted user or device group selected.

After you configure everything, review your profile settings and hit Create to deploy it. Once deployed, the printer will be automatically installed on all targeted devices.
